请确保已经按照了宝塔面板,该教程是基于宝塔面板进行操作的
文中涉及的ip地址请自行更换
一、克隆nginx-rtmp-module模块到服务器
git clone https://github.com/arut/nginx-rtmp-module /www/server/rtmp
二、宝塔中安装nginx带nginx-rtmp-module模块
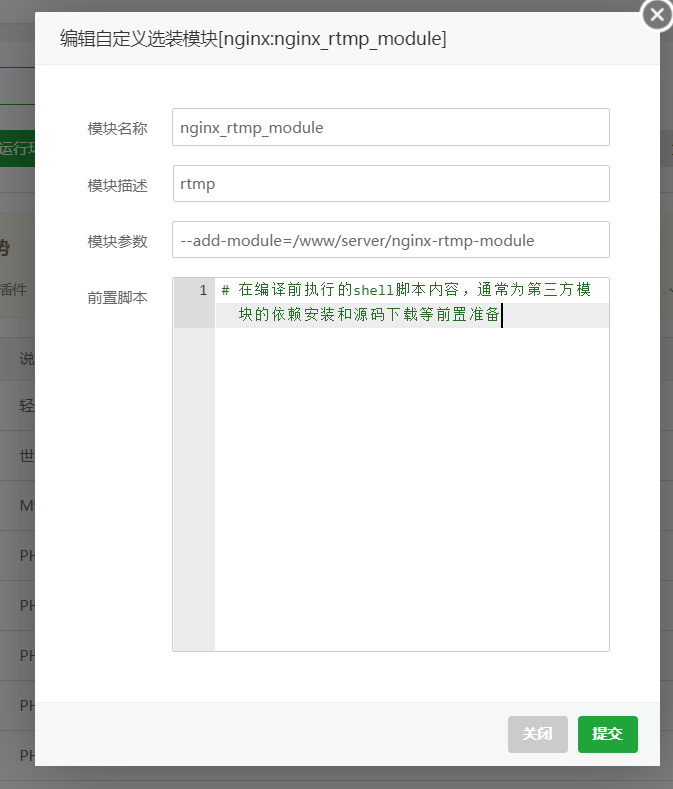
宝塔面板-软件商店 找到nginx 安装 选择编译安装 会出现自定义模块界面,
点击添加,在弹出的界面输入:
- 模块名称:nginx_rtmp_module
- 描述: rtmp
- 参数:--add-module=/www/server/nginx-rtmp-module

nginx添加自定义模块
等待编译安装完成
三、查看是否安装成功

四、配置拉流服务
在 nginx/conf 下创建 rtmp.conf
文件内容如下
rtmp_auto_push on;
rtmp {
    server {
        listen 1935;  #监听端口,记得开放
        ping 30s;
        chunk_size 4000;
        notify_method get;

        application hls {
            live on;
            hls on;
            hls_path /www/tmp/hls; #视频流暂存地址
            hls_sync 100ms;
            hls_fragment 1s;   #切片大小,越小占用资源越高,但是延时越小,默认5s
        }
        application live {
                        live on;
        }
        # Video on demand
        #application vod {
        #    play /www/tmp/Videos;
        #}
        # Video on demand over HTTP
        #application vod_http {
        #    play http://localhost:8080/vod/;
        #}
    }
}
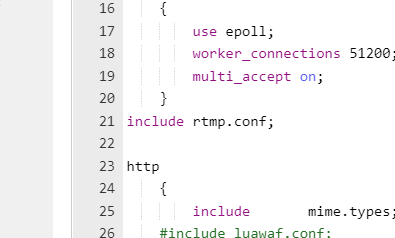
在nginx.conf event{}后添加引入

五、配置监控服务
该步骤如果不需要可以跳过
在nginx.conf配置文件server{}里面加入
 #----------------rtmp的设置-----------
    #rtmp-http 配置这些配置放在nginx.conf的http{}里面
        #rtmp状态
        location /stat {
            rtmp_stat all;
        rtmp_stat_stylesheet stat.xsl;
        }
        location /stat.xsl {
        root /www/server/nginx-rtmp-module;
        #rtmp- module模块安装地址,这个可以通过http看到状态
        }
        #http支持hls流播放
        location /hls {
        #Serve HLS config
            types {
                application/vnd.apple.mpegurl    m3u8;
                video/mp2t ts;
                     }
        root /www/tmp/hls; #与视频流暂存地址相同
        expires -1;
        add_header Cache-Control    no-cache;
        }
#----------------rtmp的设置-----------
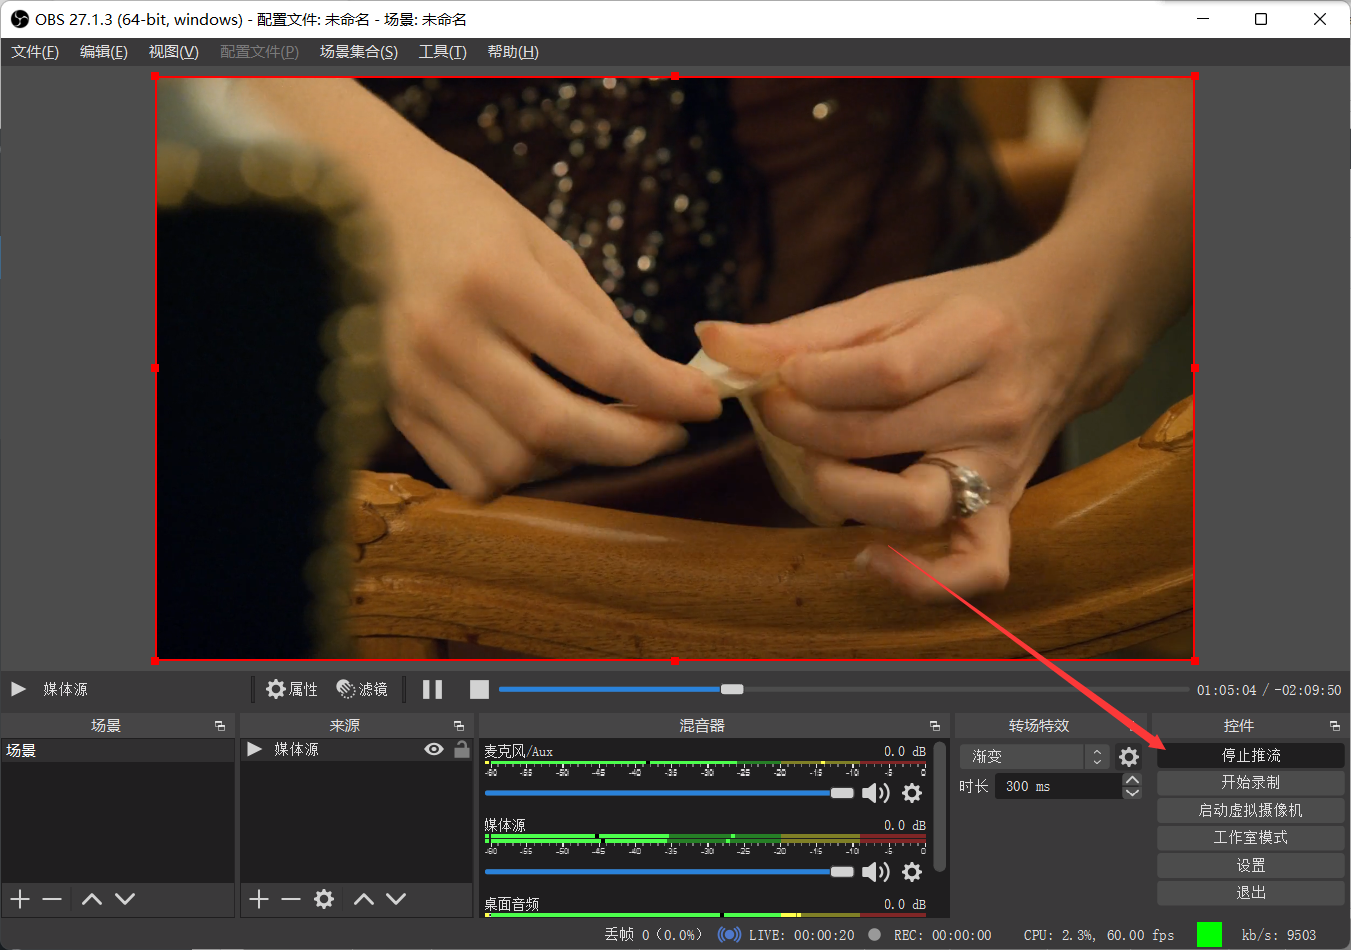
六、推流
这里我使用的是OBS推流


七、查看监控
地址:192.168.0.131:888/stat

八、拉流
进行此步骤前请确认1935端口已经开放
这里使用的是potplayer


至此成功!!!
本文作者为小王子,转载请注明。
